Thursday, April 25, 2013

Creating Clay Pots and Artistic Volume


Name: Felisa Alberts
Date: April 24, 2013
Lesson Name:

Creating Clay Pots and Artistic Volume

Materials used:

-I used Paints from Michael's, it's about 50 cents for a 2 ounce container of Acrylic Paint.
-Paint Brushes
-Plastic Bag
-Using things around the house, you can create the clay. It's a cheap recipe and allows students to make it in class with VERY LITTLE mess:

Emily's Fantastic No Cook Playdough Recipe
This one was doing the rounds when my children were toddlers. Not sure who Emily is - but her recipe is great!

2 cups of plain/all-purpose flour
1 cup salt
1 cup cold water
1 tbspn oil (vegetable oil is fine - baby oil smells lovely).

Drop the ingredients into a plastic bag and seal. Let the children knead them together inside the bag - then tip it out for modeling fun.


*Hint: If you don't want to spend money on paint, you can buy kool aid packages and use them as food coloring, it's cheaper and adds quick color to the play dough.


Any resources that helped inspire this project: My love of math and play dough!

List the subject that your lesson ties in with: This lesson is art centered. Math is integrated into it and you can also tie science and scientific method into this lesson.

Step-by-step with text and photos:

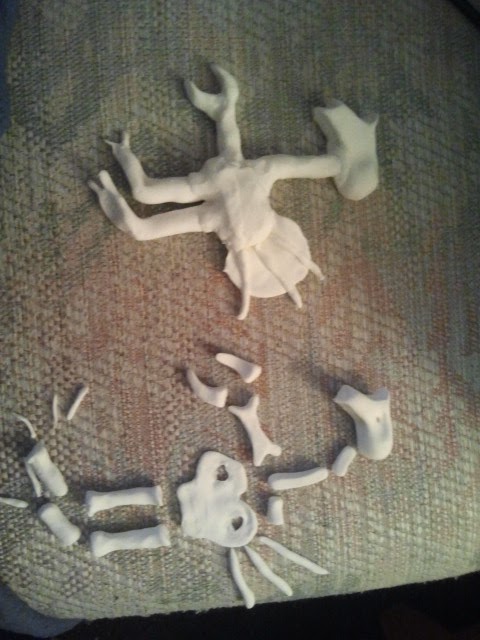
1. Get a plastic bag and the materials listed above. Drop the materials into the plastic bag and begin to knead them together. It will look similar to this. *BE SURE TO ADD FOOD COLORING OR KOOL AID IF YOU'D LIKE COLORED PLAY DOUGH*
 
 
2. Have students construct a cylinder pot. They may paint this pot however they'd like.
 
 
The Math Part
3. The next day, the teacher will discuss volume and what it looks like. Some questions that the teacher could ask are:
       -What does volume look like?
       -What do you think is the volume of your cylinder?
       -How do we solve for volume?
       -Can we use volume in the real world?
4. The teacher will talk explain volume and how to find it.
5. The students will then calculate the volumes for their individual pots. They will then measure out that volume using a beaker. They will pour that amount into their pot.
6. Students will then analyze the results. Were their predicts right or inaccurate? Why is that? How could they have conducted their experiment better?
 

Extra tips for problem-solving:
HAVE EXTRA SALT ON HAND! I found out, without the salt, it takes hours for this play dough to absorb the water.


Art Vocabulary:
-Color
-Texture
-Medium


Wednesday, April 24, 2013

Sunny Sundial


Step-By-Step


Name: Haley Stewart
Lesson Name: Sunny Sundial
Materials:
·      Paper Plate
·      Markers/Colored Pencils/Crayons
·      Glue/Tape
·      Pencil for stick
Subject: Math~ learning how to tell time
Step-by-step:
1.    Label the plate with numbers in black marker to represent a clock

2.    Then draw a dot in the center marking the place of where the stick will go

3.    Decorate the plate to make it look pretty

4.    Poke a hole through the center dot to make a spot for the stick

5.    Flip the plate over and put some tape or glue on the back to hold the stick in place

6.    Take it out in the sun and tell the time on your own sundial clock

7.    Have fun!
Art Vocabulary: Decorating the plate will demonstrate use of color that will attract audience to see the piece. The circular shape reflects the familiar shape of a clock and the numbers placed around the circular plate adds balance to ease the eyes of the viewers.

Complement Tree


Name: Mererid Green
Date: 5/17/2013
Lesson Name: Complement Trees
Materials used:
Paper Bags, recycled paper, pens, glue, tissue paper
Any resources that helped inspire this project:
-Pinterest gave me the idea for making a tree out of a paper bag
-Seen a ‘Friendship tree’ in a primary school where the whole class made a tree and had to write all their ideas about friendship on the leaves.
https://fbcdn-sphotos-h-a.akamaihd.net/hphotos-ak-prn1/v/528379_10152800319790441_678020804_n.jpg?oh=ccf1d88076324d683922cf32f8aa2eaa&oe=5179D59A&__gda__=1366976232_d1e29d7f217ca7f0cc2ec6093bdf7c8d
List the subject that your lesson ties in with: Social Studies and Science.

Step-by-step with text and photos:
1.       Cut the top of the bag into strips of varying lengths between 5-10 cm.
2.       Hold the bottom of the bag flat and twist between base and strips to make a trunk.
3.       Twist strips into branches
4.       Cut out leaf from recycled paper


5.       Write complement on leaf for each person in your group and decorate as you wish.

6.       Attach the leaf to the person’s complement tree.


Extra tips for problem-solving:
-Warn children to not rip the bottom of the branches when twisting
-Can use weight in bottom of the paper bag to make sturdier.
-Leaves need to be appropriate size for the tree
Art Vocabulary:
Balance: This is an important element to this project because the branches and leaves need to be arranged in a way that look aesthetically pleasing. If all the branches or leaves are alla ranged onto one side then this will not look correct as the balance would be wrong so the children will have to consider this when arranging them.
Line: The children need to think about the line of the tree and branches to make it look natural. For example if one branch was folded in half and at a right angle this would look fairly unnatural.
Color: The children won’t be specified what color the leaves have to be so it will be interesting to see if they feel comfortable experimenting with color or if they just stick to the stereotypical green leaves on a  tree. I would encourage them to do whatever they prefer.

Mererid Green


Cultural Diversity History/Art Project

Name: Robbin Stokes 
Date: 4-24-13
Lesson Name: Cultural Diversity
Grades:4th- 5th grade


Materials:
glue
8.5 x 11 white paper
markers
scissors
rulers

Subjects the lesson ties into:
history and art

Lesson Plan:
this is a great lesson to do at the beginning of the school year to get the students to get to know each other better. First start with a history lesson about the different cultures if the world. then have the students go home and research a little about their own cultural backgrounds keeping in mind that they have to make a flag. next have the students figure out how they want to represent their cultures by using the flag. 

Draw and color:
Step-By-Step...
since this project is able expressing who you are by displaying culture, the only directions would be for the students to pick a flag that represents a part of their culture and draw it. if the child has more than one culture to be represented, they creatively represent it by adding either a symbol of integrating the other culture's flag into it. The student can be completely artistic with how they make their flags.


Share and Discussion:
at the end of the project the students can present their flags to the class and explain their culture. the class can ask questions about the student's culture as well.


Art vocabulary: 
Line: when drawing most flags the concept of line and space come into play
Shape: some flags and things that represent certain cultures


Example:
 American, Native American, and Mexican


For students with disadvantages:
for hyperactive students, put on calming music from the different cultures of the world to soothe their minds while drawing.

My "Sole" Shoe

Name: Mandy Culbertson

Date:
4-23-13

Lesson Name:
My “Sole” Shoe

Materials used:
Construction paper, scissors, writing paper, pencil, crayons, markers, stickers, etc. (anything that can be used to make your shirt more fabulous!)

Any resources that helped inspire this project: Past experiences in the classroom as well as Pinterest.

List the subject that your lesson ties in with: Language, Reading


Step-by-step with text and photos:
1. Pass out My “Sole” Shoe template to class.
 

2. Provide materials that you want the class to use to create their shoes, such as crayons, markers, glue, stickers, etc. Be creative!
**Hint: You may want to put different supplies at different tables and rotate groups around to make their shoe while some students are writing. This may cut down on the chaos.


3. Cut shoes out. Depending on grade level, some children may need further instruction as to where to cut along.


4. Pass out writing paper after giving the prompt and expectations to the class.


5. When finished with creating the shoes and the writing portion of this project, the teacher can then attach the shoes to the child’s write-up.


6. If time and space are permitted, you can then hang them up on a wall mural or class bulletin board.


7. Most importantly, HAVE FUN!


Extra tips for problem-solving:
Some of the younger grade levels may need a darkened line around where they are supposed to cut so as not to cause confusion. Some children may even need their shoe to be cut out prior to them decorating it. Also, the writing portion can be done with the student speaking aloud to the teacher what they would like to write and the teacher can write it for them. This may be useful for very young children and/or children with a disability.

Art Vocabulary:
Color: Color is obviously a big part of this project. There are always those few stinkers that just like black and white pictures, but my rule of thumb is that they have to use the number of colors that corresponds to their age. So, if Mandy is seven years old, Mandy needs at least seven different colors on her shoe.
Texture: Texture can be optional in this project. Depending on the teacher and the ability level of the classroom, students can use various objects to add texture to their shoes and make them even more unique from the rest of the class.
Size: Size can play a big role when coloring your shoe. This project really works the fine motor skills when the child is trying to stay in the lines when coloring the laces or the tongue of the shoe. They have to control their hand muscles in order to stay within the lines.

Fossils and Art!

Name: Brandy Ungles

Date: April 22, 2013

Lesson Name: Fossils and Art!


Materials used:

  • Model magic (I used store bought, but here is a link for homemade)
  • construction paper/ recycled paper
  • Markers*
  • Paint*
  • Paint Brushes
  • Tissue Paper*
  • Modge Podge*
  • Glue
  • Dirt (I had to add some hot cocoa mix to my dirt as it was a little more rocky than fine like soil or dirt)
  • Recycled* boxes
  • Buttons*
  • Ribbons*
  • Feathers*


*indicates optional


Resources that helped inspire this:

  • The Crayola Art and Science Lesson book. I did modify to fit with something I would like to do, but this was where the idea came from.
     
     
This lesson incorporates Art with Science. I enjoyed creating this lesson because I think it is important to be able to integrate a standard school subject with something more creative. I plan to teach science when I am done with school, and rarely see art and science integrated, so I thought that this lesson would provide a fun challenge.

This lesson can be used with several ages or grade levels depending on what modifications you make to this lesson, or the accommodations you provide. 

This lesson is a paleontology lesson about digging for fossils and imagining what the dinosaur will look like once you put together it's skeleton. For this demonstration we will be gearing towards a fifth grade class, with the students working in partners.   


Step-by-step:

  •   Once students are in partners, hand them each a small amount of Model Magic clay in order to create bones for their partner to dig up.  Make sure they have enough to construct a full dinosaur skeleton. *note- the student making the fossils, does not need to create a specific shape for the dinosaur.
  • Student molding class in to a skull and neck

    • Once the student has made all of the bones, give them a box to represent a dig site. Fill this box with dirt, then let the student bury the bones they just made once the clay has had time to dry.
    This is my dig site, I used a recycled box and glues construction paper to the outside which is totally optional.


    Dig site box with bones buried and dirt (and hot cocoa on top)
    •  Have the student exchange boxes with their partner. Now they get to dig for fossils! Use paintbrushes, old tooth brushes, plastic spoons etc.

    Student using a brush to dig for fossils


    The students place their found bones in a small dish or on a piece of paper (I used some recycled food boats from Subway)

    •  Have the students arrange their fossilized bones on a piece of construction paper in to whatever shape they think their dinosaur is. Glue the bones down when you are happy with the shape.

    • After the students have created their dinosaurs skeleton, it is time to create a diorama showing what they think their dinosaur would have looked like in the prehistoric period.
    • Students will need more Model Magic clay to create their dinosaur!

    My completed dinosaur from the skeleton outline.
    This is what it looks like next to it's skeleton. 

    •  Next have your students decorate their dinosaur and the diorama that your dinosaur will be living in. 
      I used my big box of school supplies
      And old art supply box

      Dinosaur being decoupaged with tissue paper

      His house decorated with construction paper scraps

      Toilet paper tube tree, and Halloween spider web moss

      Dinosaur in enclosure

      close-up

      Don't for get to give your dinosaur a name, mine looked like a turkey.
    •  Finally, display the completed artwork with the fossils in your classroom, and enjoy!


Extra tips/ Problem-Solving:
-My Turkeosaur didn't stand on his own, which is why he is in the back of  the box for support, so maybe use toothpicks or something else for more support. 
-If you are doing this with younger kids pre-make the bones
-Another adaptation could be drawing the dinosaur instead of creating a display. 
-Have the students bring items from home if they wish, but also provide many mediums for their use. 
-Most importantly though: Cats love art projects, and dinosaurs. Keep them away! =) 


Art Vocabulary: 
- This project used the art ideas of:
  • Form- When you create the 3-d skeleton as well as the actual dinosaur you are using form. 
  • Texture- Is also used when decorating the box or the dinosaur.
  • Perspective- Is used when placing the dinosaur in the habitat and decorating the box. 
  • Balance- Is important when actually creating your dinosaur in order to make sure they are symmetrical and able to stand. 


I hope you enjoyed this lesson! Respond in the comments below with your suggestions or if you have any questions. =)